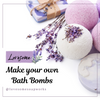
How to Make Your Own Bath Bombs at Home
, by Paul Walker, 3 min reading time

, by Paul Walker, 3 min reading time
Bath bombs are a delightful way to elevate your bath experience with fizz, fragrance, and skin-loving ingredients. Making them at home is not only fun but also allows you to customize the scents, colors, and ingredients to suit your preferences. Here’s a step-by-step guide to creating your own bath bombs.
Dry Ingredients:
Wet Ingredients:
Mix the Dry Ingredients
Combine baking soda, citric acid, cornstarch, and Epsom salt in a mixing bowl. Whisk the ingredients thoroughly to eliminate any lumps and ensure an even blend.
Combine the Wet Ingredients
In a separate small bowl, mix the melted coconut oil, essential oil, and food coloring. Stir well to distribute the color and fragrance evenly.
Incorporate the Wet and Dry Ingredients
Slowly pour the wet mixture into the dry ingredients, stirring constantly. Be careful to add it gradually to prevent the citric acid from reacting prematurely. The mixture should have a consistency similar to damp sand.
Adjust the Moisture Level
Use the spray bottle to add small amounts of water if needed. The mixture should hold its shape when squeezed in your hand but not feel too wet.
Mold the Bath Bombs
Fill each half of your bath bomb mold with the mixture, pressing it firmly to ensure it holds its shape. Overfill each side slightly, then press the halves together. Let the mold sit for a few minutes before carefully removing the bath bomb.
Dry and Cure
Place the bath bombs on a parchment-lined tray to dry for at least 24 hours. Store them in an airtight container once they’re fully hardened.
Simply drop one bath bomb into a tub of warm water and watch it fizz and dissolve, releasing its fragrance, color, and skin-softening ingredients.
Making your own bath bombs is a creative, rewarding project that adds a touch of luxury to your self-care routine. Whether for yourself or as thoughtful handmade gifts, these fizzy delights are sure to impress!